How To Display Images In The Flip Page By Myself?
A further learning to create wonderful vision when you convert images to a 3D page flip book.
Images are something records our life. We take photos, collect photos and some day we want to show it to others. We may have many ways to display all these images, such as out it in our blog or upload it to a photo album of our personal space. In another way, we can use 3D PageFlip for Image to convert it into a page flip book because it’s a new and creative way to show your images. With the images flip book, others can view your images with page turning experience. He can have a good enjoy in the 3D vision.
So how can you display images in the flip page by yourself?
OK, let take a further learn now.
OK, let take a further learn now.
Firstly, start up your 3D PageFlip for Image. And press ‘Setting’ in your home panel of the page turning book software.

Secondly, choose ‘Common Setting>Page Settings’ and the detailed options will be displayed on the right of the setting window.
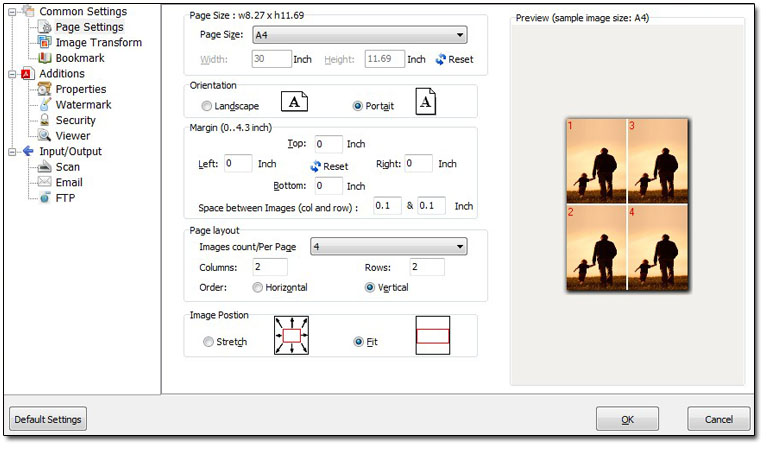
Page size: You can define the page size for each flip page. There are comprehensive size options to choose. Absolutely if you still find no one fits your ideal flip page, you can customize by yourself.
Orientation: Tick landscape to get a wide vision.Tick Portrait to get an elongated vision.
Margin: define page margin for each flip page and the space between images. It’s good way to adjust the position of images.
Page Layout: You can define the quantity of images in each page, you can define its columns and rows to get the best layout.
Image Position: Stretch to fit the screen and Fit to keep the orient size of the images.
No comments:
Post a Comment